Skip to content

Instructions for Middle School Students

Instructions for Middle School Students published on

RDECOM Scientist and Engineers bring their special skills and enthusiasm to STEM Night at Fallston Middle School, by U.S. Army RDECOM on Flickr, used under a CC-BY 2.0 license
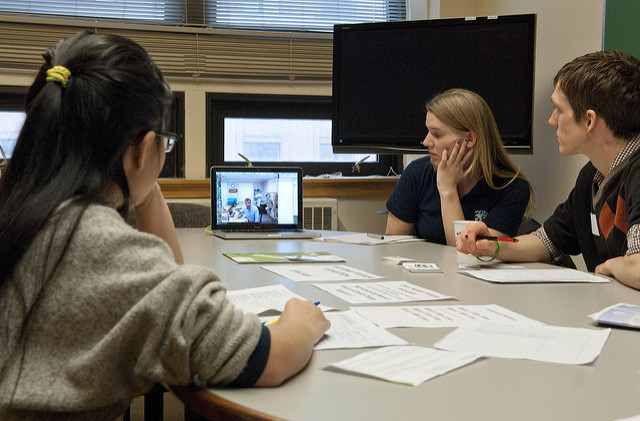
Your company is planning a diversity initiative to interest local students in STEM careers (STEM = Science, Technology, Engineering, and Math). The program is similar to a “Take a Kid to Work Day” event. Middle and high school students from the area will apply to learn about careers and will spend most of the day working one-on-one with employees like you to learn about what the career involves.

The students you will be working with will get to complete an activity that you would do during a normal work day. Your writing task is to create a instruction sheet that the students can follow to complete a simple task while shadowing you at work. Choose a task that you can explain in about 500 words or less, including any warnings or troubleshooting tips.

Your project should meet the following criteria:

  •  include the following sections:
    • a short introduction/overview.
    • a list of required materials.
    • the at least five different steps to be completed (more than five is fine).
    • troubleshooting tips.
  • outline the steps necessary in full detail.
  • list any safety notes or warnings.
  • is illustrated with photos/screenshots.
  • adjust the words and phrases for a non-technical audience.
  • use clear, uncluttered layout and design.

Project Examples by Students

  • None yet.
  • Yours could be here!

The Project Assignment

Step 1: Decide on the activity you will focus on for your project.
Your focus will be to talk about a simple task that someone in your career field would complete. Try to limit yourself to topics with which you have some expertise (or at least some experience). Since middle and high school students will be following the instructions, choose something that they could believably complete and that will not place them in a dangerous situation.

Step 2: Do some feasibility research.
Make sure that the topic you have chosen will work for the project. Think about the following questions:

  • Do you know how to complete the task OR are you confident you can learn it quickly?
  • Do you have access to the materials needed to complete the task?
  • Do you have or can you take photos to illustrate your instructions?
  • Do you know someone who can test your instructions for you?

Step 3: xxx.Paper plane instructions by Mon Aguilar from the Noun Project, used under a CC-BY 3.0 license.
Write instructions that your reader can follow to complete a task. Your reader is someone who has never completed the task before and who is just learning about the task and your career field. 

Step 4: Check your images, design, and layout.
Your instructions should be clear and uncluttered. The design and layout should make it easy for the students to understand what they need to do.

  • xxx
  • xxx
  • Review the photos you have included to illustrate the steps of your instructions. Be sure that any images you include tie directly to the words on the page. They need to be integrated, not just random illustrations.

Step 5. Review your project for design and basic writing errors.

Everything you write should use accurate/appropriate image editing, grammar, spelling, punctuation, mechanics, linking, and formatting. These are important basic writing skills that you should have developed in high school.

Review your project, considering the layout and design of your project. Refer to the details listed in the Ten Ways to Improve Your Writing and the grammar and design Lynda.com videos included on that page.

Step 5: Submit your project in Canvas.
Upload your completed self-assessment and your project in Canvas.

Rhetorical Analysis Memo

Rhetorical Analysis Memo published on

Writing by Gunnar Wrobel on Flickr, used under a CC-BY-SA 2.0 licenseA rhetorical analysis is designed to train you to look closely, carefully, and critically at how and why texts (memos, reports, letters, proposals, instructions, pamphlets, etc.) are created in order to determine the overall effectiveness of a text in terms of fulfilling a purpose. These skills are essential training for you as professional and technical writers because they enable you to see a text in a variety of ways, evaluate the strengths, weaknesses, usefulness, credibility, and effectiveness of a document. An understanding of rhetorical strategies also allows you to make conscious choices in your own technical and professional communication.

Your task is to select a piece of technical or professional writing/communication that is common in your field and analyze its rhetorical situation, including its effectiveness. You will report on your findings in a short memo.

The Project Assignment

Step 1: Select a document from your field.
Select a technical/professional document that is commonly produced in your profession:

  • It can be a memo, professional website, report, letter, proposal, instructions, pamphlet, procedures, specification, safety guidelines, etc.
  • It should be at least a page in length (500 words).
  • If it is a lengthy document, you can choose to focus on a portion of it.
  • It cannot be a document that you wrote, because it’s harder to analyze your own work.
  • It cannot be a document that I have written, because that gets awkward.

You need a digital copy of the document to submit, so scan the document if necessary.

Step 2: Read the details on technical communication and rhetorical analysis.
The following readings describe the features of technical communication:

If you’re unfamiliar with the ideas of rhetorical analysis, these pages from the Online Writing Lab (OWL) at Purdue can give you some basic background information:

You should also check out the information on how to write a memo, since your assignment requires memo format.

Step 3: Write your analysis memo.
Write a memo to me that analyzes the document you have chosen, using the characteristics of effective technical communication to guide your analysis. Your memo should be clearly explain your points with well-developed details from the document you are analyzing. Conclude your analysis memo with your evaluation of the document’s overall effectiveness.

Step 4: Submit your project in Canvas.
Upload your analysis memo AND a copy of the document you analyzed in Canvas.


Photo Credit: Writing by Gunnar Wrobel on Flickr, used under a CC-BY-SA 2.0 license. Icons are under a public domain license, downloaded from the NounProject.


This assignment was adapted from Kristin Arola’s Engl 402: Summer 2011: Project 1: Rhetorical Analysis, available under a Creative Commons Attribution-NonCommercial-ShareAlike 3.0 Unported License.

Trip Report

Trip Report published on

College of DuPage Hosts Career Fair 2015 3 by COD Newsroom, used under a CC-BY-SA 2.0 licenseIn the workplace, trip reports document what happened during a trip. Some companies use the reports to show how the goals for the trip were met. Others use the reports to share what happened with the rest of the organization.

For our class, your goal will be to tell the class members about the event or place you visit on your trip. Depending upon the trip, you might try to convince others to participate in the same or similar events, or you might provide tips for others who will take similar trips (e.g., for others going on job interview trips). You will share your trip report with the entire class.

The format for the report varies from company to company, but generally, your trip report should accomplish the following:

  • explains the goals for the trip.
  • documents what actually happened.
  • summarizes the lessons learned and/or outlines any follow-up that needs to take place.
  • (optionally) includes an expense report for the trip.

Your trip report must be submitted within one week of the event or trip. In the event of a multi-day trip, submit your report within one week of the last day of the trip.

You may complete only ONE trip report as part of your work towards a grade higher than a B.

The Project Assignment

Step 1: Plan to attend an approved event or to go on an approved trip.

The pre-approved list of events focuses on opportunities for you to expand know knowledge of your career and of intercultural and global issues. You can attend any of the following for this activity:

If you are interested in attending an event that is not covered by the list, you can write me to ask if it will count. In your email, be sure to explain how the event is a professional activities that relate to your major and/or career plans.

Step 2: Familiarize yourself with the characteristics and features of reports.
The following readings offer advice on writing trip reports:

The Air Force Handbook, The Tongue and Quill, provides an explanation of how trip reports work in military settings:

The trip report is another form of an after-action report that is commonly used in the Air Force. The trip report concisely conveys information about the trip’s purpose, travelers, and itinerary after the trip is concluded. A more detailed discussion of relevant information from the trip is presented followed by any recommendations and/or conclusions. In short, the trip report should answer the who, what, when, where, why and how questions in a concise, orderly format. The trip report should convey everything the addressees need to know about the trip, especially as it relates to the unit’s mission and any recommendations or costs. (p. 177)

Step 3: Go to the event or on the trip, and gather information for your report.

When you attend the event, take notes on what happens (as possible) and gather any materials that you can use as you write your report. For instance, you might pick up a program for a presentation or business cards from a job fair. Remember that your notes can be photos as well (e.g., take a photo of a PowerPoint slide that you want to remember later).

If desired, take photos of yourself or of displays at the event to document your participation. You can insert these images (as well as photos or scanned images of anything you pick up at the event).

Step 4: Write your Trip Report.
Write your trip report in your word processor, using memo format. The length of your report will vary, according to the length of the event. A report on a one-hour meeting of your professional fraternity will be shorter than a report on a full-day at a job fair. There is not a minimum or maximum page length. Write as much as you need to, but be sure to include all of the required information.

Your trip report should include the following information:

  • the goals for the trip.
  • what actually happened.
  • the lessons learned and/or any follow-up that needs to take place.

You can include an expense report, if relevant; however, one is not required. You are not writing your report for reimbursement.

Use the example trip reports on the right to help guide your writing and formatting. Remember that information-rich headings will help organize your report.

Step 5. Review your project for design and basic writing errors.

Everything you write should use accurate/appropriate image editing, grammar, spelling, punctuation, mechanics, linking, and formatting. These are important basic writing skills that you should have developed in high school.

Review your project, considering the layout and design of your project. Refer to the details listed in the Ten Ways to Improve Your Writing page on the course website and the grammar and design Lynda.com videos included on that page.

Step 6: Submit your project in Canvas.
Upload your completed project in Canvas, in the Trip Report Assignment and post it in the Trip Report Discussion.


Photo Credit: College of DuPage Hosts Career Fair 2015 3 by COD Newsroom, used under a CC-BY-SA 2.0 license. Icons are under a public domain license, downloaded from the NounProject.


Progress Report

Progress Report published on

1405AfricaProgressReport32 by Africa Progress Panel on Flickr, used under a CC-BY 2.0 licenseYou will write a Progress Report that outlines the status of your Genre Analysis Report. Think of your audience for this project as me. In the workplace, the audience might be your supervisor, others in management, and/or a client and other stakeholders. In the case of public initiatives, the audience can include the public, local, state, or regional community government officials, and local businesses and organizations.

The Project Assignment

Step 1: Assess your project.
Review the current draft for your Genre Analysis Report and compare what you have accomplished to the requirements of the Assignment.

Determine what you have completed and what you still need to do. Consider any challenges you have encountered and how you can address them. Compare your work to the schedule in your proposal and determine whether any adjustments are necessary.

Step 2: Familiarize yourself with the characteristics and features of progress reports.
Use the following resources to learn more about progress reports:

From Lynda.com (free login with your Virginia Tech pid and password). Note that you must be logged into Lynda.com for the video embedded below to play.

From Technical Writing by Hamlin, Rubio, and DeSilva

From Style for Students Online: Effective Technical Writing in the Information Age by Schall

Step 3: Write a progress report.
Your report should outline

  • what you have completed
  • what work you still have to do
  • how you plan to complete the remaining work for the project.

Include any questions or concerns you have that may affect your progress. You can include images, screenshots, graphs, tables, and other visual elements to explain your work (examples and tips).

Write your report in memo format (with the standard headings of To:, From:, Date:, and Subject:). You can use Google Docs or another word processor. Aim for 1 to 2 single-spaced pages.

Step 4: Check for specifics.
Use concrete, specific details to describe the work on your project. Tell your readers precisely that you have done and how you will complete the remaining work. The examples below demonstrate how to make sure you use details.

Rather than general information like this Use specific language like this
We are making good progress on the project. In the two weeks since inception, our four-member team has achieved three of the six objectives we
identified for project completion; we are on track to complete the project in another three to four
weeks. (from p. 49 of Business Communication for Success by McLean)
We have assigned the remaining tasks to team members. We have assigned the remaining project tasks to the following team members:

  • Geordi is in charge of organizing and writing intro/front matter.
  • Data will focus on the majority of the body for the report, including introduction, methods, results and conclusions.
  • Wesley will write and formally make the recommendations (with visuals and diagrams, if necessary).
We agreed on how to organize the pages on the website. We created a basic wireframe with sections for the information that we need to include on each page of the website (site title, site menus, page title, content, and footer with copyright information and address).

Step 5. Review your project for design and basic writing errors.
Everything you write should use accurate/appropriate image editing, grammar, spelling, punctuation, mechanics, linking, and formatting. These are important basic writing skills that you should have developed in high school.

Also review your project, considering the layout and design. Refer to the details on the course website listed in the Ten Ways to Improve Your Writing and the grammar and design Lynda.com videos included on that page.

Step 6: Submit your project in Canvas.
Upload your completed self-assessment and your project in Canvas.


Photo Credit: 1405AfricaProgressReport32 by Africa Progress Panel on Flickr, used under a CC-BY 2.0 license.

Short Report Proposal

Short Report Proposal published on

Plan Blueprints by on Flickr, used under a CC-BY 2.0 license
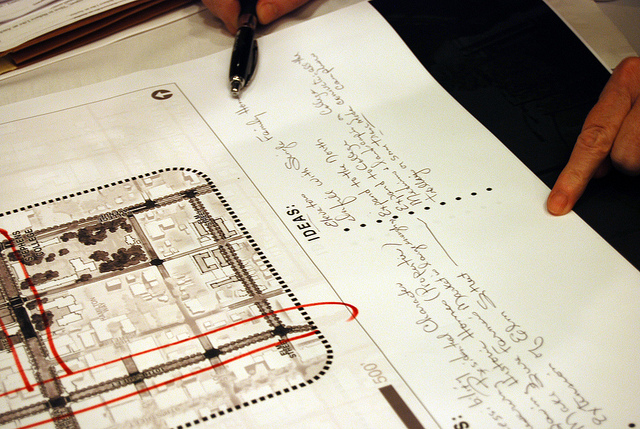
You will choose the kind of writing (or genre) that you will explore more deeply in your Genre Analysis Report. Once you have made your decision, you will write a proposal that explains your choice, how it will help you in your career, and what you will include in your research as you work on your report. I will review and approve your proposal (or suggest revision).

The Project Assignment

Step 1: Decide on the genre you will focus on for your project.
For this project, propose the kind of writing that you will examine in your Genre Analysis Report. Look back over the table you created for the analysis of writing in your field project to identify kinds of writing that you have never written. You can also consider kinds of writing that are not listed in your table. Here are some examples to help you decide what to focus on:

  • You want to learn about a kind of writing that is important in your field, but that you would find it hard to write without actually being in the workplace.
  • You want to learn more about a particularly long kind of writing that you’d never have time to write now. Rather than writing a 100-page research recommendation report, for instance, you could write a genre analysis report that focuses on research recommendation reports.
  • You want to explore how to accomplish a specific goal with a social media tool. For instance, you want to learn how to use Twitter to promote a start-up software company. It would be impractical to create a bunch of fake posts, so you could learn about how the process works by writing a genre analysis report.

Whatever you choose, be sure it is something you really want to learn more about and a kind of writing that you have never done before. Let this assignment give you the opportunity to find out more about something you really want to know.

Step 2: Familiarize yourself with the characteristics and features of proposals.
The following chapters from online textbooks offer advice on writing proposals:

Step 3: Write your proposal.
Create your project in your word processor. Think of your audience for this project as me, Traci. Your goal is to convince me that the genre of writing you have chosen to focus will help you prepare for writing in the workplace when you graduate (or during future internships or jobs).

In your proposal, include the following sections and information:

  • Background (or Introduction)
    Give some background on your genre, your experiences with it to date, what you already know, etc. Then clearly state, “I would like to study this genre for the following reasons: . . . .” What are your motivations for doing work in this area?
  • Areas to be Studied
    What are the key points you will explore/research? What are some questions you will ask and try to answer with this project? What do you intend to do with this project? Be sure to identify the ethical and/or intercultural and global issues that you need to consider as you examine the genre you have chosen.
  • Methods of Research
    What is your research strategy? What exactly are you planning to do to try to find answers to your questions?
  • Timetable
    What are your target dates for various stages of completion of your Genre Analysis Project? Consider the time that you have to complete the project, and then create your schedule to finish by the due date.
  • Qualifications
    What makes you qualified to do this research? What skills do you bring to the table that will help you deal with this topic effectively?
  • Request for Approval
    Ask for approval; ask for guidance, articulate your biggest concerns at this point; ask for suggestions about next right steps; provide contact information.

Share your draft with your writing group for peer feedback. Use the advice you receive from your readers to revise your bio before the due date.

Step 4. Review your project for design and basic writing errors.
Everything you write should use accurate/appropriate image editing, grammar, spelling, punctuation, mechanics, linking, and formatting. These are important basic writing skills that you should have developed in high school.

Also review your project, considering the layout and design of your project. Refer to the details on the course website listed in the Ten Ways to Improve Your Writing and the grammar and design Lynda.com videos included on that page.

Step 5: Submit your project in Canvas.
Upload your project in Canvas.


Photo Credit: Plan Blueprints by KOMUnews on Flickr, used under a CC-BY 2.0 license.

Professional Bio Statement

Professional Bio Statement published on

170126-A-RJ696-005 by 8th Theater Sustainment Command PAO on Flickr, used under Public DomainYou will create a professional biographical statement that tells colleagues, clients, and the public about your background, your work, and your interests. A professional bio is often used as an introduction of a new employees or when an employee taking on new responsibilities (like a promotion).

This assignment is a kind of job application project, since you will be using the kind of details that you could include on your resume or in a cover letter. The difference is that you are framing the details in a biographical statement. It is another way to position yourself as a professional in your career field.

The Project Assignment

Step 1: Decide on a specific audience and purpose for your bio. 
Your writing will be stronger if you have specific readers in mind, so decide on a company or organization that you will write your bio for. You can choose any of the following:

  • a company you did an internship for.
  • a company you have worked for in the past.
  • a club or Greek organization you are a member of.
  • your department or a special office or program on campus.
  • a situation you choose (you can check with me if you’re unsure).

Imagine that your bio will be published in a staff newsletter or on a “Meet the Team”-type webpage. You can also write the bio for use on a campus website or in a publication for alumni. While your scenario is imaginary, the details in your biographies should be current and accurate.

Once you have decided on a situation for your bio, think carefully about who will read your bio. Your audience might include any (or several) of the following:

  • coworkers and team members.
  • managers or supervisors.
  • employees you manage.
  • clients and potential clients.
  • employees at competing companies.
  • potential employers.
  • journalists.
  • the public.

Think carefully about how to strike a balance between demonstrating your capabilities and sharing personal details that will help people get to know you.

Step 2: Read advice about writing bio statements.
The following websites (in no particular order) offer advice on writing short bio statements:

Step 3: Review some example bios.

Because it is impossible to make bios anonymous, I can’t share student bios for this project. Instead, you can review real-world examples listed below. You may need to click on the person’s name to see the bio.

Step 4: Write your biography statement.
As you compose your bio, focus on strong, specific details that tell readers about who you are. The details in your biography should be current and accurate. You can pretend that you have graduated, but do not make up any other future information.

In your bio, do the following:

  • Include biographical facts that relate to the company, organization, or group.
  • Discuss your interest in ethical and/or intercultural and global issues in your field or career, or related to the company, organization, or group.
  • Use design elements (like headings, layout, etc.) to highlight key information and make the bio easy to read and visually appealing. 
  • Include well-chosen photo(s) that fit the audience and purpose of the bio.

Share your draft with your writing group for peer feedback. Use the advice you receive from your readers to revise your bio before the due date.

Step 5. Review your project for design and basic writing errors.
Everything you write should use accurate/appropriate image editing, grammar, spelling, punctuation, mechanics, linking, and formatting. These are important basic writing skills that you should have developed in high school.

Also review your project, considering the layout and design of your project. Refer to the details on the course website listed in the Ten Ways to Improve Your Writing (under the Course Help menu) and the grammar and design Lynda.com videos included on that page.

Step 6: Submit your project in Canvas.
Upload your completed self-assessment and your project in Canvas.


Photo Credit: 170126-A-RJ696-005 by 8th Theater Sustainment Command PAO on Flickr, used under Public Domain.

Genre Analysis Report

Genre Analysis Report published on

20130806-FS-LSC-0186 by U.S. Department of Agriculture on Flickr, used under Public DomainWrite an analytical report that explains everything that goes into writing a specific kind of writing that you will do in your career. To find out how the kind of writing works, you will find online resources, interview people in the field, and analyze examples.

Think of your audience for this project as yourself. Your goal is to learn about the characteristics of a specific kind of writing you will typically do in the workplace. While you will probably not complete such a thorough examination of the kinds of writing you do when you are in the workplace, the skills you develop during this project will be ones you can return to whenever you are faced with a kind of writing that you are not familiar with.

The Project Assignment

Step 1: Review the feedback on your proposal and make any necessary adjustments.
While you are waiting for my feedback, go ahead and start your report. Once I return your Short Report Proposal, review my feedback and make any adjustments to your plans that are necessary. I have never had to reject a proposal, but I do ask for changes to plans occasionally.

Step 2: Familiarize yourself with the characteristics and features of reports.
The following chapters from online textbooks offer advice on writing reports:

If you like video tutorials, these Lynda.com course materials (free login with your Virginia Tech pid and password) can help you:

If you need help with documentation for the sources you use, read Chapter 5. Using Sources from Style for Students Online: Effective Technical Writing in the Information Age.

This information will help with the layout and design of your reports:

Step 3: Complete your research on the genre you have chosen.
Reflect on your knowledge of the genre, considering the examples you have seen and what you know about the genre’s importance in your field. Once you establish what you already know, conduct the following research to learn more about the genre:

  • A literature review and evaluation of online resources
    Find out what have other researchers and practitioners have found out about the particular genre in question. Check the course textbooks as well as any resources you own or have access to. Search online for additional resources and note the information and advice you find.
  • Interviews with people who actually write and read these documents
    Ask people who read the genre what they expect to find and how they judge the quality of the works. Ask people who write the genre how they prepare to write, what they include in the genre when they write, and how they make decisions about the genre.
  • Site inspection
    Examine the actual physical work environment or conditions where people who write the genre complete their work. Think about where they gather the information needed to compose, where they complete their composing, and how they share the genre when they are done.

Step 4: Write your Genre Analysis Report.
20120814-OSEC-LSC-0043 by U.S. Department of Agriculture on Flickr, used under Public DomainCreate your project in your word processor. With examples and relevant formatting, your report will likely be close to 15 pages long, though there is not a minimum or maximum page length. Write as much as you need to, but be sure to include all of the required information.

Your report should include the following sections:

  • cover page (be sure to list your name as the author)
  • executive summary (or abstract)
  • table of contents
  • introduction
  • methods
  • results (or findings)
  • conclusions
  • references (your sources and documentation)
  • appendix (where your full examples of the genre go)

You can include additional sections and information, and you can change the headings to fit your analysis. Use the example genre analysis reports (listed above) to make decisions about how to vary the organization.

Be sure that the body of your report covers this information:

  • The purpose for your particular genre—that is, you will identify and explain the situation that creates the need for this particular form of written communication, the purpose and occasion that calls this kind of writing into being, or the work that needs to be done and to which this text responds.
  • The audience or users of this particular genre, including their knowledge, experience, and work environments, their motivations for working with the genre in question, how they perceive and use the text in question, and what they do with it.
  • The constraints at work on the writers and the readers of these documents, including computing environments, documents, facts, and workplace objects, but also less tangible factors such as relations, beliefs, attitudes, traditions, images, interests, and motives that are in play in their organizations or workplaces.
  • The preparation needed to write the genre, including how you would gather data and the research you do would do.
  • The organization of the genre, detailing the typical order for the document, any possible variation of the order, and any additional sections that may be added.
  • The contents of all sections of the kind of writing, describing the kind of information included in each of the sections.
  • The ethical and/or intercultural and global issues that may impact the kind of writing.
  • bibliography that provides documentation for all of the resources you have consulted. You may use whatever bibliographical format you are most familiar with. Here are some tools if you are unsure what to use:
  • At least three examples of the particular genre in question and analyze them to extract the generic conventions, characteristics, features, and strategies that distinguish this genre. In the case of longer genres, you can link to the examples.

Step 5. Review your project for design and basic writing errors.
Everything you write should use accurate/appropriate image editing, grammar, spelling, punctuation, mechanics, linking, and formatting. These are important basic writing skills that you should have developed in high school.

Also review your project, considering its layout and design. Refer to the details on the course website listed in the Ten Ways to Improve Your Writing and the grammar and design Lynda.com videos included on that page.

Step 6: Submit your project in Canvas.
Upload your project in Canvas.


Photo Credit: 20130806-FS-LSC-0186 and 20120814-OSEC-LSC-0043, both by U.S. Department of Agriculture on Flickr, used under Public Domain.

Continuity Folder Documents

Continuity Folder Documents published on

the unplanned desk coordination by emdot on Flickr, used under a CC-BY 2.0 licenseYour group will collaborate on resources to add to a continuity folder. For the purposes of this project, you will be creating materials that future students who take Business Writing or Technical Writing can use to guide their activities in the course. Additional details on the project are explained after the following Background information.

Background

If you are lucky, when you begin a new job, you will find a continuity folder on the desk or on the computer to help you complete your work. The exact name of this folder will depend on your workplace. It can be called a continuity folder, binder, portfolio, or book; standard (or standing) operating procedures; or a transition book.

Inside this folder, you will find documents and information that will help you complete your work. The contents can include:

  • mission statements and goals
  • position responsibilities
  • system and social media login information
  • advice and tips
  • schedules, timelines, and calendars
  • instructions, protocols, and procedures
  • templates and examples
  • checklists
  • budget and funding information
  • inspection reports
  • organization charts and info on personnel

You will use this folder to guide your daily work, and one of your on-going tasks will be to keep the contents of the folder current. In the event that you are not available, the person filling in for you will use the folder to determine what to do and how to do it. When you move to another position, the next person in the position will use the information that you leave in the folder.

One point of clarification, businesses, government agencies, and other organizations also create continuity plans, which typically account for how the organization will use to continue operations in a time of emergency. FEMA, for instance, offers advice for how to write this kind of continuity plan. For this activity, you are working on a position-focused continuity folder, not a business or agency plan.

Details on Your Project

You will create a document to add to a continuity folder that will be given to new students taking Business Writing or Technical Writing. Think back to the beginning of the course, and reflect on things that you wish you knew from the beginning or strategies that you would advise these new students to adopt to have a positive experience in the course.

Your project should meet the following criteria:

  • use a you-attitude that will set readers at ease.
  • explain concrete information, rather than general advice.
  • include suggestions from all members of the group.
  • have a polished, professional design.

Keep in mind that the documents that you include in your continuity folder (for this assignment or in the workplace) will be reviewed by others. Be sure that your advice avoids any unethical commentary. You want to be honest, but you should not include any advice that might focus on someone’s personality or collegiality.

The Project Assignment

Step 1: Review the Project How-To Documents.
The box on the left points to resources on how to create continuity documents for a variety of different organizations. Review the documents to get an idea of the kinds of information that are appropriate. In addition to these documents, share any personal experience you have with continuity documents with your group. For our purposes, a list of tips or lessons learned is just as appropriate as step-by-step instructions.

Step 2: Choose a topic.
Your writing group will choose a topic to focus on from the following list:

  • Collaborating on group work
  • Succeeding in an online course
  • Applying a particular design strategy
  • Using Slack as a group

You can make these general topics more specific, if you desire. For instance, you might talk about advice for managing the revision process as a group. One condition however, the specific assignments and activities in the course change, so do not focus on any particular assignment in your document.

Whichever you choose, be sure that you have a way for every member of your group to contribute. If you choose to do advice on group work, for instance, have each member of your group share a tip.

Step 3: Decide how to publish your document.
Choose a basic format for your resource. It can be a Google Doc or an infographic. Since I will share your resources with students I teach in the future, it needs to be simple to integrate with other course documents.

Step 4: Compose your document.
As a group, collaborate on writing your document. Creating a shared Google Doc that you can all add to is probably the easiest way to begin gathering your notes, but choose whatever strategy works for you.

Step 5. Review your project for design and basic writing errors.
Everything you write should use accurate/appropriate image editing, grammar, spelling, punctuation, mechanics, linking, and formatting. These are important basic writing skills that you should have developed in high school.

Review your project, considering the layout and design of your project. Refer to the details listed in the Ten Ways to Improve Your Writing and the grammar and design Lynda.com videos included on that page.

Step 6: Submit your project in Canvas.
One member of your group will submit your link in Canvas. One submission works for the entire group. Since your guide is published on the Internet, one person will submit the link. If you use a Google Share link, be sure that you have shared your document with tengrrl@vt.edu so that I can add comments. For technical help, check out the How do I submit an assignment on behalf of a group? guide on the Canvas Help site.

Readings for Support


Photo Credit: the unplanned desk coordination by emdot on Flickr, used under a CC-BY 2.0 license.

Group Progress Report

Group Progress Report published on

Detail from Recycling InfographicA progress report tells stakeholders the status of a project. You might write a progress report at specifically decided points as you work on a project, such as the beginning, middle, and end of the work. In other cases, you might write a regularly scheduled progress report at the end of every week.

For this activity, you will write a progress report with your group that outlines the status of your writing guide. Ethical considerations are an important part of progress reports. Everything that you include should be honest and clear. Stakeholders will use the information you provide to make decisions throughout their organization. Glossing over problems or failing to admit setbacks will not provide readers the information that they need and could conceivably harm business.

Think of your audience for this project as me. In the workplace, the audience might be your supervisor, others in management, and/or a client and other stakeholders. In the case of public initiatives, the audience can include the public.

The Project Assignment

Step 1: Assess your project.
Review the current draft for your Writing Guide and compare what you have accomplished to the requirements of the Assignment.

As a group, determine what you have completed and what you still need to do for your writing guide. Consider any challenges you have encountered and how you can address them. Compare your work to your schedule and determine whether any adjustments are necessary.

See the Readings for Support below for additional examples and advice.

Step 2: Write a progress report.
Your report should outline

  • what you have completed
  • what work you still have to do
  • how you plan to complete the remaining work for the project.

Include any questions or concerns you have that may affect your progress. You can include images, screenshots, graphs, tables, and other visual elements to explain your group’s work (examples and tips).

Write your report in memo format (with the standard headings of To:, From:, Date:, and Subject:). You can use Google Docs or another word processor. Aim for 1 to 2 single-spaced pages.

Step 3: Check for specifics.
Use concrete, specific details to describe the work that your group has completed. Tell your readers precisely that you have done and how you will complete the remaining work. The examples below demonstrate how to make sure you use details.

Rather than general information like this Use specific language like this
We are making good progress on the project. In the two weeks since inception, our four-member team has achieved three of the six objectives we
identified for project completion; we are on track to complete the project in another three to four
weeks. (from p. 49 of Business Communication for Success by McLean)
We have assigned the remaining tasks to team members.

We have assigned the remaining project tasks to the following team members:

  • Geordi is in charge of organizing and writing intro/front matter.
  • Data will focus on the majority of the body for the report, including introduction, methods, results and conclusions.
  • Wesley will write and formally make the recommendations (with visuals and diagrams, if necessary).
We agreed on how to organize the pages on the website.

We created a basic wireframe with sections for the information that we need to include on each page of the website (site title, site menus, page title, content, and footer with copyright information and address).

Step 4: Polish the design of your report.
Apply design strategies to make your report easy to read and understand. Consider the PARC system (from the Lynda.com videos last week) and the tips on the Ten Ways to Improve Your Writing page to give your report a professional look. In particular, make sure that you use headings in the document that make the sections obvious. Remember that your headings and subheadings should create information-rich signposts for readers.

Step 5. Review your project for basic writing errors.
Everything you write should use accurate/appropriate image editing, grammar, spelling, punctuation, mechanics, linking, and formatting. These are important basic writing skills that you should have developed in high school. Use the reading 6.5 Revision Checklist for Progress Reports to check your draft before submitting.

Step 6: Submit your project in Canvas.
Upload your completed self-assessment and your project in Canvas.

Readings for Support

From Technical Writing by Hamlin, Rubio, and DeSilva

From Style for Students Online: Effective Technical Writing in the Information Age by Schall


Photo Credit: Detail from Municipal Solid Waste (MSW) in the United States 2012 Infographic.

Proposal for Writing Guide Group Project

Proposal for Writing Guide Group Project published on

Meeting via Skype by University of Michigan School of Natural Resources & Environment on Flickr, used under a CC-BY 2.0 license.After your writing group has decided on the kinds of writing you will cover in your project and the way you will publish your project online, you are write a short proposal as a group that tells me your group’s plans. I will review and approve your proposal (or suggest some changes).

Your primary audience for this project is me. Your primary goal is to tell me about your project and to give me enough details to demonstrate that you are collaborating successfully.

Your group’s proposal has the secondary audience of you and your group members, and the secondary purpose of allowing you and your group members to make decisions about your writing guide, such as team responsibilities and strategies to ensure project unity and coherence.

The Project Assignment

Step 1: Set up a Google Doc for your group’s proposal.
Perhaps an obvious step, but someone in your group needs to set up a Google Doc where you will compose your proposal. Share the Doc with everyone in your group, so that you can all edit. Also share the Doc with me (tengrrl@vt.edu).

Step 2: Make preliminary decisions about your project together.
Following the instructions in the writing guide assignment, decide on the kinds of writing your group will profile and the way that you will publish your project online. Use the table of kinds of writing that your group created to make your selections of the most useful kinds of writing to profile.

As you discuss the way you will publish your project online, consider the tools that you will use for the project and whether your group has the expertise necessary to complete the project in a specific medium. For instance, if only one member of your group has experience with HTML coding, building a website may not be the best choice.

Step 3: Write a group proposal that outlines all of your decisions.
Your proposal should include the following information:

  1. Background/Introduction
    Give some background on your group’s focus. Discuss the overall characteristics and interests that your group shares to provide a context for the kinds of writing and the approach that your group will take for the project.

  2. Kinds of writing to be profiled
    Outline the different kinds of writing that your guide will profile. You must include one kind of writing for each group member. For instance, if you have six group members, your guide must profile six kinds of writing. Provide enough information to identify the kinds of writing completely. Your explanation should make it clear that the kinds of writing are distinct and different.

  3. Publication medium and related tools
    Consulting the information in the writing guide assignment, choose the medium and related tools that you will use to publish your guide online so that everyone in the class can benefit from your work. Your proposal should indicate the medium you have chosen, why it is the best choice, and how you will take advantage of it to explain the details about the kinds of writing you will profile. In addition, your group should provide some preliminary information about the tools that you will use to publish the work. For example, if you are creating a series of videos, you would need to talk about how you will film them, how you will edit them, and where you will publish them. My strongest piece of advice here is to choose something that your group will enjoy working on together. Have fun with your project.

  4. Methods of research
    Discuss how your group will find out about the different kinds of writing you are profiling. Identify any resources you will use, people you will interview, or examples and experience that you have that will be part of your research for the guide.

  5. Group member responsibilities and qualifications
    Each of you must contribute to the final project, but you will determine how you collaborate. You may write the entire guide collaboratively or divide sections up among group members. Additionally, you will need to make some decisions to take advantage of group member expertise, assigning roles like a team manager to make sure everyone remembers group deadlines, an editor who proofreads everything, a continuity reader who makes sure that the different sections flow together in a unified way, a technical expert who is in charge of getting everything online, and so forth. You can choose whatever roles work for your group. There are no required roles.

  6. Timetable
    Set a schedule for your project, including target dates for various stages of completion. Create your schedule to finish by the due date. If your group gets down to the last minute and needs to use the grace period, that’s fine; but plan to be on time.

    In your schedule, address issues such as when preliminary research will be complete, when you will have a first draft of your profiles, and when you will have your first full draft. The specific work you do will depend upon your publishing medium. For instance, if you are doing videos, you may set a target date for creating scripts and/or storyboards before you begin recording your videos.

  7. Request for approval
    Business and technical proposals typically end with a section that asks for approval to begin work on the project. In your concluding section, your group can also ask for guidance or articulate any concerns.

Step 4. Review your project for design and basic writing errors.
Once you have a full draft of your proposal, review your work to ensure it includes all the required information and makes a good first impression. In terms of design, pay particular attention to your use of headings and layout to make your proposal clear and unified. Incorporate tables and charts as appropriate to organize the information.

Also check your work for accuracy and correctness. Everything you write should use accurate/appropriate image editing, grammar, spelling, punctuation, mechanics, linking, and formatting. These are important basic writing skills that you should have developed in high school. Review your entire project, referring to the details listed in the Ten Ways to Improve Your Writing and the grammar and design Lynda.com videos included on that page.

Step 5: Submit your proposal in Canvas.
Your group will provide the Share link to your proposal in the Assignments section of Canvas. Be sure that you have shared the Google Doc with tengrrl@vt.edu so that I can view and comment on your work.

The proposal will earn a group grade of either complete (full credit) or incomplete (no credit). If the proposal is incomplete, your group will be asked to revise the proposal.


Photo Credit: Meeting via Skype by University of Michigan School of Natural Resources & Environment on Flickr, used under a CC-BY 2.0 license.