Skip to content

Trip Report

Trip Report published on

College of DuPage Hosts Career Fair 2015 3 by COD Newsroom, used under a CC-BY-SA 2.0 licenseIn the workplace, trip reports document what happened during a trip. Some companies use the reports to show how the goals for the trip were met. Others use the reports to share what happened with the rest of the organization.

For our class, your goal will be to tell the class members about the event or place you visit on your trip. Depending upon the trip, you might try to convince others to participate in the same or similar events, or you might provide tips for others who will take similar trips (e.g., for others going on job interview trips). You will share your trip report with the entire class.

The format for the report varies from company to company, but generally, your trip report should accomplish the following:

  • explains the goals for the trip.
  • documents what actually happened.
  • summarizes the lessons learned and/or outlines any follow-up that needs to take place.
  • (optionally) includes an expense report for the trip.

Your trip report must be submitted within one week of the event or trip. In the event of a multi-day trip, submit your report within one week of the last day of the trip.

You may complete only ONE trip report as part of your work towards a grade higher than a B.

The Project Assignment

Step 1: Plan to attend an approved event or to go on an approved trip.

The pre-approved list of events focuses on opportunities for you to expand know knowledge of your career and of intercultural and global issues. You can attend any of the following for this activity:

If you are interested in attending an event that is not covered by the list, you can write me to ask if it will count. In your email, be sure to explain how the event is a professional activities that relate to your major and/or career plans.

Step 2: Familiarize yourself with the characteristics and features of reports.
The following readings offer advice on writing trip reports:

The Air Force Handbook, The Tongue and Quill, provides an explanation of how trip reports work in military settings:

The trip report is another form of an after-action report that is commonly used in the Air Force. The trip report concisely conveys information about the trip’s purpose, travelers, and itinerary after the trip is concluded. A more detailed discussion of relevant information from the trip is presented followed by any recommendations and/or conclusions. In short, the trip report should answer the who, what, when, where, why and how questions in a concise, orderly format. The trip report should convey everything the addressees need to know about the trip, especially as it relates to the unit’s mission and any recommendations or costs. (p. 177)

Step 3: Go to the event or on the trip, and gather information for your report.

When you attend the event, take notes on what happens (as possible) and gather any materials that you can use as you write your report. For instance, you might pick up a program for a presentation or business cards from a job fair. Remember that your notes can be photos as well (e.g., take a photo of a PowerPoint slide that you want to remember later).

If desired, take photos of yourself or of displays at the event to document your participation. You can insert these images (as well as photos or scanned images of anything you pick up at the event).

Step 4: Write your Trip Report.
Write your trip report in your word processor, using memo format. The length of your report will vary, according to the length of the event. A report on a one-hour meeting of your professional fraternity will be shorter than a report on a full-day at a job fair. There is not a minimum or maximum page length. Write as much as you need to, but be sure to include all of the required information.

Your trip report should include the following information:

  • the goals for the trip.
  • what actually happened.
  • the lessons learned and/or any follow-up that needs to take place.

You can include an expense report, if relevant; however, one is not required. You are not writing your report for reimbursement.

Use the example trip reports on the right to help guide your writing and formatting. Remember that information-rich headings will help organize your report.

Step 5. Review your project for design and basic writing errors.

Everything you write should use accurate/appropriate image editing, grammar, spelling, punctuation, mechanics, linking, and formatting. These are important basic writing skills that you should have developed in high school.

Review your project, considering the layout and design of your project. Refer to the details listed in the Ten Ways to Improve Your Writing page on the course website and the grammar and design Lynda.com videos included on that page.

Step 6: Submit your project in Canvas.
Upload your completed project in Canvas, in the Trip Report Assignment and post it in the Trip Report Discussion.


Photo Credit: College of DuPage Hosts Career Fair 2015 3 by COD Newsroom, used under a CC-BY-SA 2.0 license. Icons are under a public domain license, downloaded from the NounProject.
 

Progress Report

Progress Report published on

1405AfricaProgressReport32 by Africa Progress Panel on Flickr, used under a CC-BY 2.0 licenseYou will write a Progress Report that outlines the status of your Genre Analysis Report. Think of your audience for this project as me. In the workplace, the audience might be your supervisor, others in management, and/or a client and other stakeholders. In the case of public initiatives, the audience can include the public, local, state, or regional community government officials, and local businesses and organizations.
The Project Assignment

Step 1: Assess your project.
Review the current draft for your Genre Analysis Report and compare what you have accomplished to the requirements of the Assignment.

Determine what you have completed and what you still need to do. Consider any challenges you have encountered and how you can address them. Compare your work to the schedule in your proposal and determine whether any adjustments are necessary.

Step 2: Familiarize yourself with the characteristics and features of progress reports.
Use the following resources to learn more about progress reports:

From Lynda.com (free login with your Virginia Tech pid and password). Note that you must be logged into Lynda.com for the video embedded below to play.

From Technical Writing by Hamlin, Rubio, and DeSilva

From Style for Students Online: Effective Technical Writing in the Information Age by Schall

Step 3: Write a progress report.
Your report should outline

  • what you have completed
  • what work you still have to do
  • how you plan to complete the remaining work for the project.

Include any questions or concerns you have that may affect your progress. You can include images, screenshots, graphs, tables, and other visual elements to explain your work (examples and tips).

Write your report in memo format (with the standard headings of To:, From:, Date:, and Subject:). You can use Google Docs or another word processor. Aim for 1 to 2 single-spaced pages.

Step 4: Check for specifics.
Use concrete, specific details to describe the work on your project. Tell your readers precisely that you have done and how you will complete the remaining work. The examples below demonstrate how to make sure you use details.

Rather than general information like this Use specific language like this
We are making good progress on the project. In the two weeks since inception, our four-member team has achieved three of the six objectives we
identified for project completion; we are on track to complete the project in another three to four
weeks. (from p. 49 of Business Communication for Success by McLean)
We have assigned the remaining tasks to team members. We have assigned the remaining project tasks to the following team members:

  • Geordi is in charge of organizing and writing intro/front matter.
  • Data will focus on the majority of the body for the report, including introduction, methods, results and conclusions.
  • Wesley will write and formally make the recommendations (with visuals and diagrams, if necessary).
We agreed on how to organize the pages on the website. We created a basic wireframe with sections for the information that we need to include on each page of the website (site title, site menus, page title, content, and footer with copyright information and address).

Step 5. Review your project for design and basic writing errors.
Everything you write should use accurate/appropriate image editing, grammar, spelling, punctuation, mechanics, linking, and formatting. These are important basic writing skills that you should have developed in high school.

Also review your project, considering the layout and design. Refer to the details on the course website listed in the Ten Ways to Improve Your Writing and the grammar and design Lynda.com videos included on that page.

Step 6: Submit your project in Canvas.
Upload your completed self-assessment and your project in Canvas.


Photo Credit: 1405AfricaProgressReport32 by Africa Progress Panel on Flickr, used under a CC-BY 2.0 license.

Group Progress Report

Group Progress Report published on

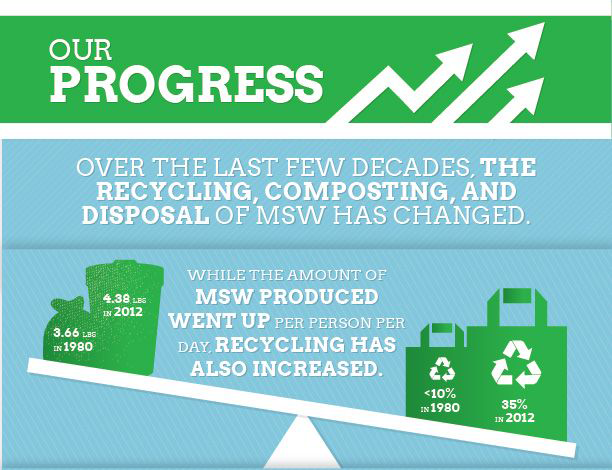
Detail from Recycling InfographicA progress report tells stakeholders the status of a project. You might write a progress report at specifically decided points as you work on a project, such as the beginning, middle, and end of the work. In other cases, you might write a regularly scheduled progress report at the end of every week.

For this activity, you will write a progress report with your group that outlines the status of your writing guide. Ethical considerations are an important part of progress reports. Everything that you include should be honest and clear. Stakeholders will use the information you provide to make decisions throughout their organization. Glossing over problems or failing to admit setbacks will not provide readers the information that they need and could conceivably harm business.

Think of your audience for this project as me. In the workplace, the audience might be your supervisor, others in management, and/or a client and other stakeholders. In the case of public initiatives, the audience can include the public.

The Project Assignment

Step 1: Assess your project.
Review the current draft for your Writing Guide and compare what you have accomplished to the requirements of the Assignment.

As a group, determine what you have completed and what you still need to do for your writing guide. Consider any challenges you have encountered and how you can address them. Compare your work to your schedule and determine whether any adjustments are necessary.

See the Readings for Support below for additional examples and advice.

Step 2: Write a progress report.
Your report should outline

  • what you have completed
  • what work you still have to do
  • how you plan to complete the remaining work for the project.

Include any questions or concerns you have that may affect your progress. You can include images, screenshots, graphs, tables, and other visual elements to explain your group’s work (examples and tips).

Write your report in memo format (with the standard headings of To:, From:, Date:, and Subject:). You can use Google Docs or another word processor. Aim for 1 to 2 single-spaced pages.

Step 3: Check for specifics.
Use concrete, specific details to describe the work that your group has completed. Tell your readers precisely that you have done and how you will complete the remaining work. The examples below demonstrate how to make sure you use details.

Rather than general information like this Use specific language like this
We are making good progress on the project. In the two weeks since inception, our four-member team has achieved three of the six objectives we
identified for project completion; we are on track to complete the project in another three to four
weeks. (from p. 49 of Business Communication for Success by McLean)
We have assigned the remaining tasks to team members.

We have assigned the remaining project tasks to the following team members:

  • Geordi is in charge of organizing and writing intro/front matter.
  • Data will focus on the majority of the body for the report, including introduction, methods, results and conclusions.
  • Wesley will write and formally make the recommendations (with visuals and diagrams, if necessary).
We agreed on how to organize the pages on the website.

We created a basic wireframe with sections for the information that we need to include on each page of the website (site title, site menus, page title, content, and footer with copyright information and address).

Step 4: Polish the design of your report.
Apply design strategies to make your report easy to read and understand. Consider the PARC system (from the Lynda.com videos last week) and the tips on the Ten Ways to Improve Your Writing page to give your report a professional look. In particular, make sure that you use headings in the document that make the sections obvious. Remember that your headings and subheadings should create information-rich signposts for readers.

Step 5. Review your project for basic writing errors.
Everything you write should use accurate/appropriate image editing, grammar, spelling, punctuation, mechanics, linking, and formatting. These are important basic writing skills that you should have developed in high school. Use the reading 6.5 Revision Checklist for Progress Reports to check your draft before submitting.

Step 6: Submit your project in Canvas.
Upload your completed self-assessment and your project in Canvas.

Readings for Support

From Technical Writing by Hamlin, Rubio, and DeSilva

From Style for Students Online: Effective Technical Writing in the Information Age by Schall


Photo Credit: Detail from Municipal Solid Waste (MSW) in the United States 2012 Infographic.