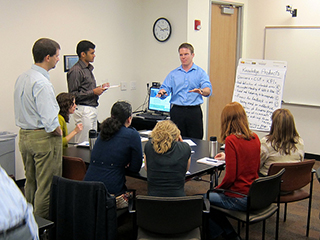
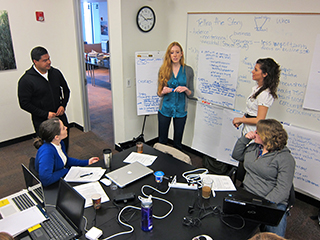
 Your group will collaborate to compose a guide to writing in the workplace. Each of you will profile a specific kind of writing, explaining everything that goes into producing the document. Your group will assemble all of these profiles into your guide, which you can publish in several ways. See more about publishing options in Step 2 below.
Think of your audience for this project as you and your group as well as others in the class. Your goal is to create a collection of how-to profiles that you can turn to at any point in the future for more information as you work on the relevant kind of writing. Additionally, as you work on your profile, you will learn the process for defining and creating a particular kind of writing. In the future, should you encounter a kind of writing that is unfamiliar to you, you can return to this process to learn how to complete the task.
The Project Assignment
Step 1: Decide on the specific kinds of writing your group will profile.
Review the details from your group analysis tables, and choose the kinds of writing your group will focus on for this project. You need to include a profile of a kind of writing written by each group member (e.g., if there are six people in your group, you need to profile a minimum of six different kinds of writing).
As an example, if I were in a group of six teachers, our project might profile six kinds of writing teachers do: syllabus, assignments, tests/quizzes, recommendation letters, emails to students, and feedback on student work.
Step 2: Choose the online publication medium your group will use for your project.
Your presentation choice is up to your group. You will publish your project online so that all your group members and others in the class can benefit from your findings. Here are some possible options: 
- A series of online brochures or pamphlets
- A collection of online info sheets (1-sheet, front and back)
- A series of infographics
- A series of videos
- A multipage website
- A series of encyclopedia entries (like Wikipedia entries, but not really on Wikipedia)
- A series of chapters from a Dummies or Complete Idiot’s Guide-style book
Your group will compose and publish the materials together, with one item for each kind of writing. For instance, if I were in that group of six teachers mentioned above and we chose to do a series of videos, we would need to create an introductory video, a video for each of the kinds of writing teachers do (6 in total), and possibly a concluding video that synthesizes the material or provides any additional tips. Our complete project would include 7–8 videos published in a YouTube channel, full descriptions and details for the channel and each video, and end credits for each video.
Your publication medium does not have to be in the list above. Just make sure that it will allow you to explain the different kinds of writing and to show examples of the kinds of writing as well as allow for a summary/description, links to useful resources (like examples), and any concluding materials or references. The way your add this information will vary. For instance, my group of teachers could mention links in the videos and then include them in the description on the YouTube page for each video.
Step 3: Complete your proposal for the project.
The proposal is your group’s first major deliverable. In your proposal, your group will explain your approach to the project, the kinds of writing you will profile, the tools you will use, the distribution of the work, and the schedule you will adhere to. Each of you must contribute to the final project, but you will determine how you collaborate.
See the proposal assignment for full details on what your group needs to submit. The proposal counts as a separate major assignment.
Step 4: Create your project.
As a group, create your project, working to make all sections flow in a coordinated way. It should be clear that the different pieces are all part of one unified collection. Your project should include the following content:
 A summary/description that introduces the entire series
- A profile of a kind of writing written by each group member (e.g., if there are six people in your group, you need to profile a minimum of six different kinds of writing)
- Details on the following for each profiled kind of writing:
- audience(s) and purpose(s)
- the research and background info needed
- structure and organization
- challenges and tips
- ethical considerations
- global/intercultural concerns
- Links to useful resources
- Concluding materials that synthesize and tie the information together
- Credits for outside resources and for those who work on the profiles and project
Note that the way you publish your project will determine how you present your content. For instance, if you create videos, your credits will be title and end credits (just like a movie). If you are creating infographics, your credits will be listed in the infographic footer.
Step 5. Review your project for design and basic writing errors.
Everything you write should use accurate/appropriate image editing, grammar, spelling, punctuation, mechanics, linking, and formatting. These are important basic writing skills that you should have developed in high school. Review your entire project, referring to the details listed in the Ten Ways to Improve Your Writing and the grammar and design Lynda.com videos included on that page.
Step 6: Publish your project and submit your link in Canvas.
Your group will publish your project on the Internet. The exact location will depend upon the publishing medium that you have chosen. One member of your group will post the link to your project in Canvas for grading purposes.
Photo Credits: Team work and Brainstorming, both by Kevin Dooley on Flickr, used under a CC-BY 2.0 license. Icons are CC-BY-3.0 license, downloaded from the Noun Project: Brochure by unlimicon, Document by Erik Kuroow, report by João Marcelo Ribeiro, Smartphone by Gregor Cresna, responsive website by lastspark, and Microphone by Bonnie Duffley.
 You will survey the kinds of writing people in your intended career field do and arrange the information in a table (like a benchmarking or comparison table). You’ll provide a short description of the different kinds of writing, identify the typical audiences and purposes, and classify the kinds of writing, matching the items to example resources online.